I thought it would be fun to make a series of GIFs that document the progress over time. I can’t even remember what it looked like as a cleared field. I admit I prefer the order that planting buildings on the site brings to the land. It was very hard to orient oneself (where is N / S / E / W). I’ve also started clearing brush and evil spiky tree bushes out from under the trees where I want to one day have grasses or beds of other flowering plants & herbs. Cultivation has begun.


Meanwhile indoors, I’ve been tidying up the interior elevations so that I can direct the height and placement of switch plates that will be along exterior walls. They channel the electrical wiring out of the Blox through which they will pipe through conduit. They do the same with any plumbing in outside walls (see image below).

Decision making secret: Get it in 3D
In my graphic design career, I’ve worked on projects that bring 2D graphics to physical spaces, be it wayfinding signage, map-making, exhibit designs, conference branding or trade show booths. So, I’m become adept at visualizing spaces, have honed my depth perception and have learned tricks along the way to get a sense of scale. None of that has translated into an ability to visualize what my house was exactly going to look like. The biggest help has been to use 3D modeling tools, like Homestyler and Sketch-up and lots of elevations drawn in Illustrator (which, admittedly is still flat). But, there’s a lot of tools out there, especially Homestyler, which are super user-friendly and quite powerful, giving me a reliable reference point for the relationships between walls, windows/openings and the appliances and furnishings placed within the space.
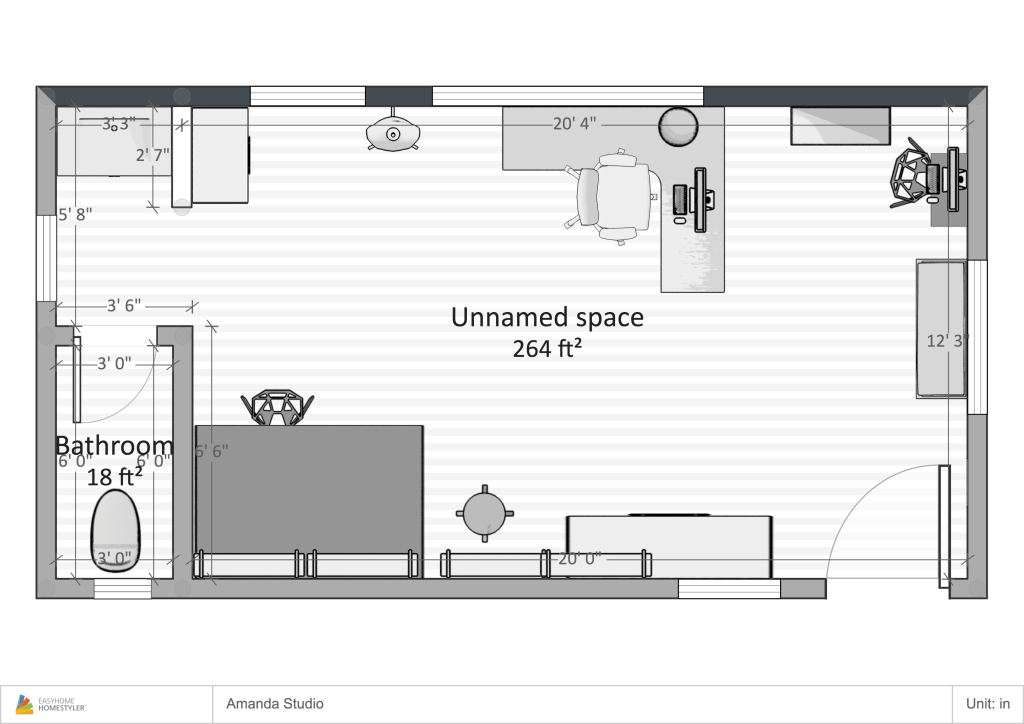
So, what decisions does a 3D rendering make easier? Scale of furnishings. Ah, an eight-foot table actually works just fine, or Oh no, I don’t have room for a 5ft width vanity in that bathroom. Deciding colors is an obvious; color for walls, flooring, ceiling, window frame, tile, trim. Whether or not to wallpaper. Discovering little details like wall returns that I’ll need to color or assign materials. The heights of windows, I have modified several of these from plan based on my furniture plan. Or where door openings too close to each other might be a bit awkward. Or door swing direction — whether the door swings in or out, the handling (side of the door that hinges are located) is left or right.
From researching around talking to other architects and interior designers, the line between architecture and interior design is blurry and totally different for every professional and process. I volunteered to take on a lot of the interior design that my architect normally would’ve included in his scope. And, some of these decisions are up to the discretion of homeowner and builder once you start building. There’s no “right” way to do it, which for a black & white rules-oriented person is not always easy for me to accept 🙂 But, it does leave a lot of room for flexibility for you to do what works for your team.